TCM Removal/Installation [AW6A-EL]
TCM REMOVAL/INSTALLATION [AW6A-EL]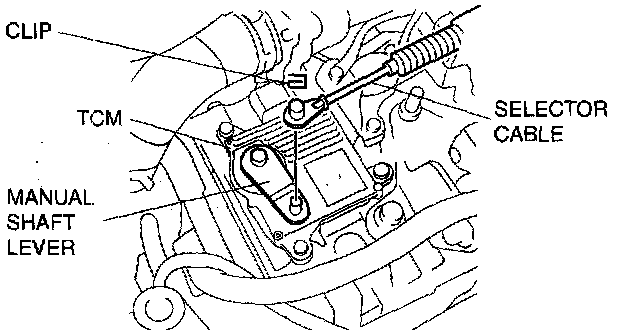
Caution:
^ Water or foreign material entering the connector can cause a poor connection or corrosion. Be sure not to allow water or foreign material on the connector when disconnecting.
1. Disconnect the negative battery cable.
2. Remove the air cleaner component.
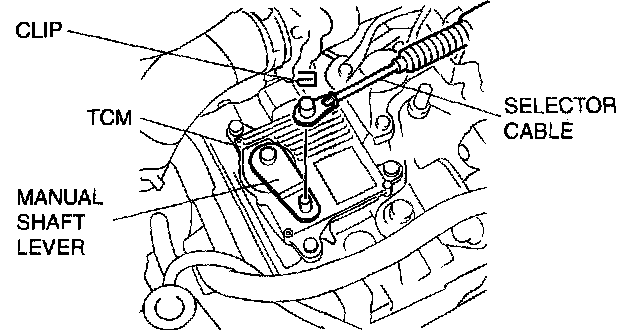
3. Disconnect the TCM connector.
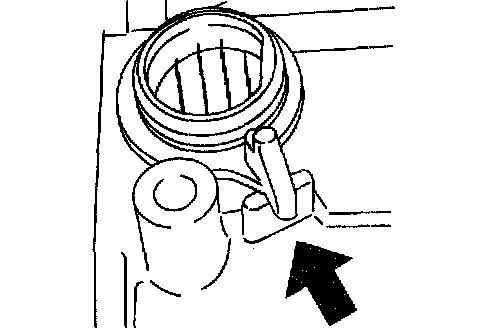
4. Remove the clip and disconnect the selector cable.
Caution:
^ Do not use an impact wrench. Hold the manual shaft lever When removing the manual shaft nut, or the transaxle may be damaged.

5. Set the adjustable wrench as shown in the figure to hold the manual shaft lever.
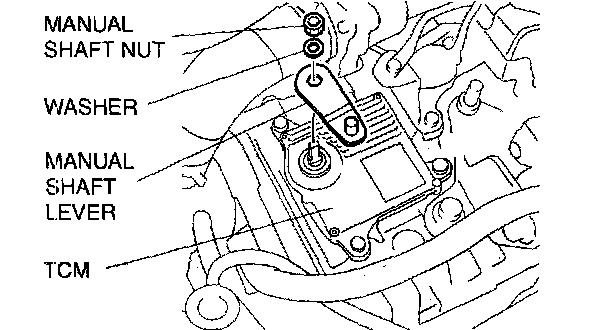
6. Remove the manual shaft nut and washer.
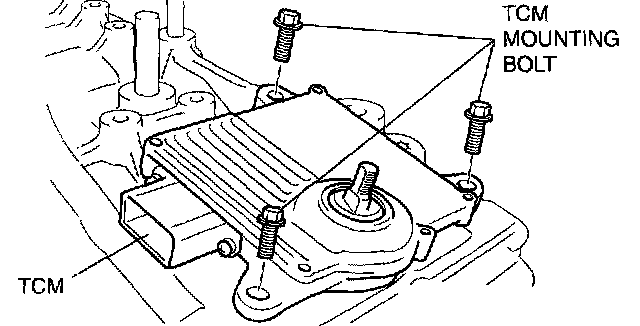
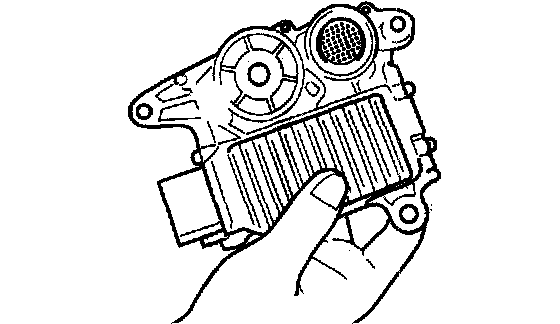
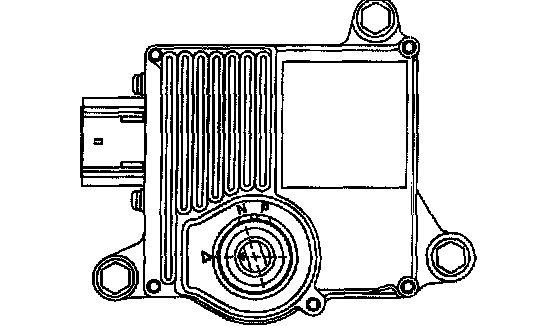
7. Remove the TCM.
Caution:
^ Do not touch the terminals.

8. Inspect the condition of the connector pin of the coupler component (foreign material, bent pins, broken pins) and O-ring after the TCM is removed.
9. Align the transaxle case and coupler component connector.
10. Be sure to match the position of the TCM marking.
Caution:
^ Do not turn more than 60° from the marking.
11. Install the TCM.
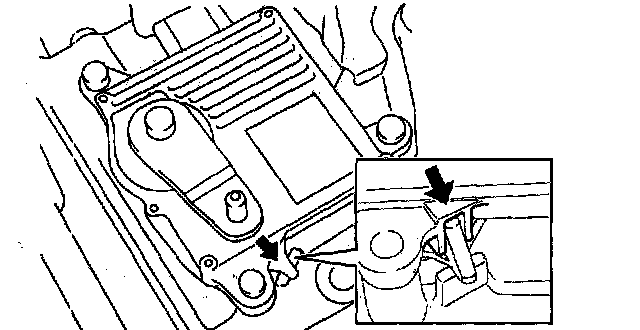
12. Verify the correct positioning of the TCM and coupler component.
13. Tighten the TCM mounting bolts.
Tightening torque 19.6 - 29.4 Nm (2.0 - 2.9 kgf-m, 14.5 - 21.6 ft. lbs.)
Caution:
^ Do not use an impact wrench. Hold the manual shaft lever when removing the manual shaft nut, or the transaxle may be damaged.
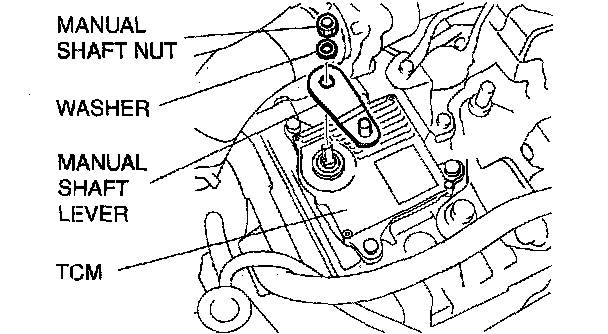
14. Install the manual shaft lever and the washer.
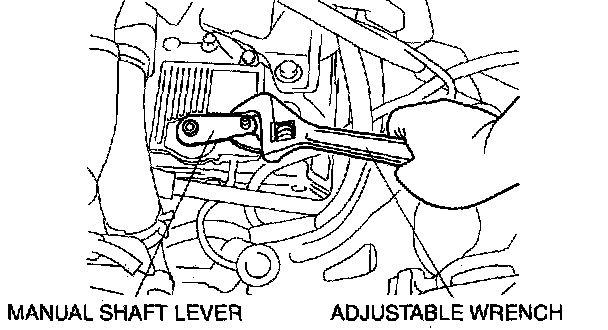
15. Set the adjustable wrench as shown in the figure to hold the manual shaft lever, and tighten the manual shaft nut.
Tightening torque 9.8 - 14.7 Nm (100 - 142 kgf-cm, 87 - 123 inch lbs.)

16. Install the clip to the selector cable as shown in the figure.
17. Shift the selector lever to P position.
18. Turn the manual shaft lever to P position.
19. Connect the selector cable and install the clip.
20. Connect the TCM connector.
21. Install the air cleaner component.
22. Connect the negative battery cable.
Warning:
^ If you replace the ATX or TCM, be sure to initialize the learned values and perform neutral position learning.
23. Perform the neutral position learning.
Neutral Position Learning
1. Engage the parking brake and use wheel chocks at the front and rear of the wheels.
2. Turn the ignition switch to the ON position. (Engine off)
Caution:
^ Inspect that the vehicle does not move before operation.
3. Shift the selector lever to the N position.

4. Be sure to match the position of the TCM marking.
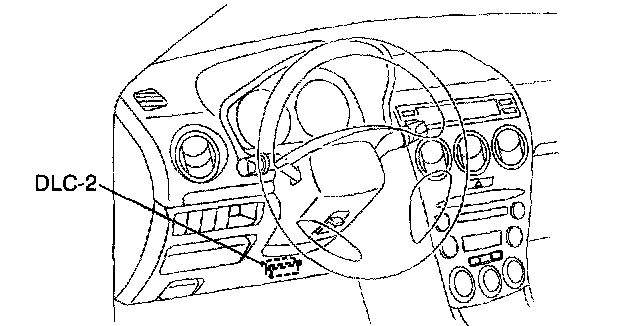
5. Connect the WDS or equivalent to the DLC-2.
6. Set up the WDS or equivalent (including the vehicle recognition).
Caution:
^ The command cannot be input, unless the ignition switch is ON, the selector lever is in N position, the engine is stopped, and the vehicle speed is 0 km/h. (0 mph).
7. Select "Neutral Position Learning" and perform procedure according to directions on the WDS or equivalent screen.
^ If input NG is indicated, inspect again that the N position mark is correct.
- If it is incorrect, adjust the manual shaft.
^ If input OK is indicated, turn the ignition switch off and the shift the selector lever to P position. Turn the ignition switch to the ON position after 5 s.
8. Shift the selector lever from P position to D range, then verify that the positions of the selector lever and the indicator are aligned.
^ If there is any malfunction, inspect the DTC.